This mail may contain affiliate links, my full disclosure can be read here. Every bit an Amazon Associate I earn from qualifying purchases.


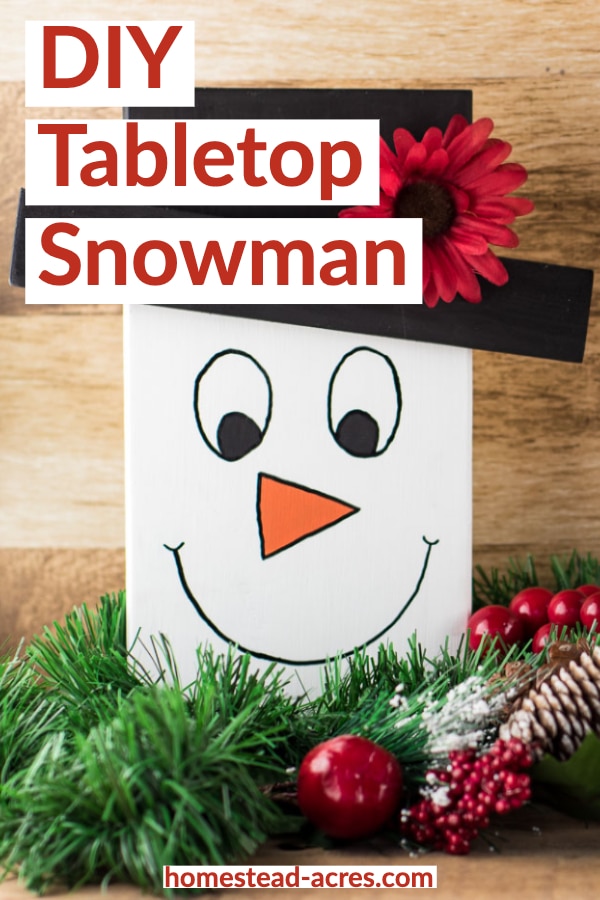
You'll dearest these adorable tabletop snowman faces! They are so easy to make and perfect if you are looking for a unique snowman craft idea that is also cheap to make. Using simple wood, scraps or even pallets these piece of work up quick and easy. I've included a printable snowman face up template further down to make it even easier for you.
I beloved making homemade snowman crafts to decorate my home for Christmas merely they are likewise sweet to get out up near of the winter.
Keeping up some winter-themed decorations actually helps to create a warm but fun experience in your abode.
Hey, our winters are long, cold and very grey so I'll take whatsoever little bit of wintertime cheer I tin can get!

If you have been thinking well-nigh making snowmen decorations for your abode this Christmas then you must endeavor these little cuties.
They use hardly any wood and could even be made out of pallets for costless.
How To Brand A Wooden Tabletop Snowman Face
Supplies
- one x 6 – 10" long
- i x iv – 6 ane/2" long
- i 10 2 – 9" long
- one" wood screws
- one 1/4" wood screws
- White chalk pigment
- Black chalk paint
- Orange chalk pigment
- Black pigment marking
- Imitation flowers
- Foam paintbrushes
- Small bristle paintbrushes
- Glue gun
- Mucilage sticks
Step 1. Set The Wood
Cut a length of 1 x half-dozen to x inches long, this volition be the snowman face up and hat. Then cut a length of 1 x iv to six 1/2 inches long this will go the base of operations of the snowman.
Finally cut a length of ane x 2 to be ix inches long, this will become the skirt of the hat. Sand all the pieces polish remembering to sand the edges and wipe off any dust.
Footstep 2. Marking The Hat

Accept the hat brim and line information technology upwards onto the face board and trace a line going beyond it. This will become your painting guideline.
We like to angle the chapeau brim so that the pinnacle lid looks similar it's tipping on the snowman's head. The measurements we use are ii one/2 inches on the left and 3 1/ii inches on the right.
Step iii. Paint The Hat, Brim And Base

Using the black chalk pigment, paint the top of the chapeau on the face board remembering to as well paint the sides and tiptop.


And so also paint the hat brim piece and the base black if y'all desire it to lucifer the hat. Set them aside to dry.
Step 4. Paint The Snowman White

In one case the lid has finished drying paint the bottom of the confront board white again remembering to paint the sides. Set up information technology aside until it's fully dry.
Step five. Trace And Pigment The Face

Side by side, information technology's time to add together a cute face to your tabletop snowman! If yous are good at cartoon faces freehand then go ahead and get artistic.
I'chiliad really non very skillful at drawing faces by hand so I made a template to impress out and use. Yous can download a copy beneath to make the project easier.
Line up the template and so it's centered on the confront lath and trace it on. If you would like to brand each i unique y'all tin trace the olfactory organ shape onto some card stock and change the angle of the olfactory organ for each one.

Using the blackness chalk paint, paint in the eyes. Then use a shade of orange for the snowman'due south carrot nose.
The eyes normally merely take one coat of paint only the lighter colors used for the nose takes 2 or iii coats depending on how night you want the color to exist.
One time the paint has stale outline the optics and nose using a black paint mark. Then depict on a smile rima oris.
You lot can use the 1 in the template or another quick and piece of cake mode to do this is to simply trace the curve of a tomato sauce can.
Footstep half dozen. Attach The Hat Skirt And Base
Line up the hat brim slice and so that the paint line is centered nether it, then turn the snowman confront over and screw them together using the 1-inch wood screws.
Plow the base upside down so the unpainted side is facing up, then center the snowman on acme of it and brand some guide marks along the border.
Start screwing in three of the one 1/4 inch woods screws inside this guide expanse, then place the snowman face on acme and finish screwing them together.
Footstep seven. Decorate Your Snowman

Now that your little snowman confront is all put together it's fourth dimension to have some fun decorating up the hat. Have fun and go creative!
I like to take modest white or ruddy flowers and glue ane on just to a higher place the brim. Just you can likewise add some ribbon only above the hat brim too.

And y'all're washed!
See that was fun right? These sugariness petty snowman faces look and then cute sitting on your mantel or a corner table. You lot could also have them peeking out from under your Christmas tree!
Prep Time 20 minutes
Active Time 30 minutes
Additional Fourth dimension 1 hour
Full Time 1 hour fifty minutes
Difficulty Easy
Estimated Cost 2.00
Instructions
- Cut your woods to length and sand smooth, so wipe off any dust earlier going farther.
- Identify the hat skirt pice on top of the face board on the angle you would similar to use for the chapeau skirt. 2 1/2 inches on the left top edge and 3 1/2 inches on the right is a adept guideline. Draw a line forth the bottom border to be your painting line.
- Paint the hat section, brim and base black and ready aside until dry out.
- Pigment the face background white remembering to get the side edges and allow dry.
- Draw or trace on a happy snowman face.
- Pigment the optics black and the nose orange. The nose may need 2 to 3 coats of paint depending on what shade you are using.
- Once the confront has dried trace effectually the edges of the eyes and olfactory organ with a black paint marker. Then draw on a oral cavity. The curved edge of a tin tin can works neat for this!
- Line up the hat brim and so that it overlaps the painting guideline you fabricated before, making sure to center information technology. So turn the snowman over and use the 1-inch wood screws to adhere the brim.
- Turn the base over and heart the lesser of the face on information technology marking the edges. First 3 screws in this area then turn the snowman on its side and finish attaching the base of operations plate.
- If desired hot glue a pretty flower simply higher up the hat brim.
More Fun Christmas Ideas
- Tall Snowman Faces For Your Front end Porch
- Piece of cake Rustic Christmas Ornaments You Can Make
- Snowy Mason Jar Luminaries
Connect With Homestead Acres!
Exist sure to follow me on social media, and then you never miss a post!
Facebook | Twitter | Pinterest | Twitter
Visit myAmazon shop to find all my favorite gardening, homesteading tools, and gadgets plus all of my printed garden books and journals!

Kim Mills is a homeschooling mom of six and lives on an urban homestead in Ontario, Canada. Blogging at Homestead Acres she enjoys sharing tips to aid y'all relieve money, grow and preserve your own nutrient.
DOWNLOAD HERE
How to Draw a Cute Snowman Easy TUTORIAL
Posted by: dorothyarence.blogspot.com

0 comments:
Post a Comment